As you might deduce from the title, I want to briefly discuss some of the common traits associated with ADHD. I was diagnosed with ADHD just over two months ago, and I hope that by the information below, I can help others who may be in a similar situation seek help sooner. This is definitely not medical advice but if anything here strikes a chord, please go and chat to your doctor.}
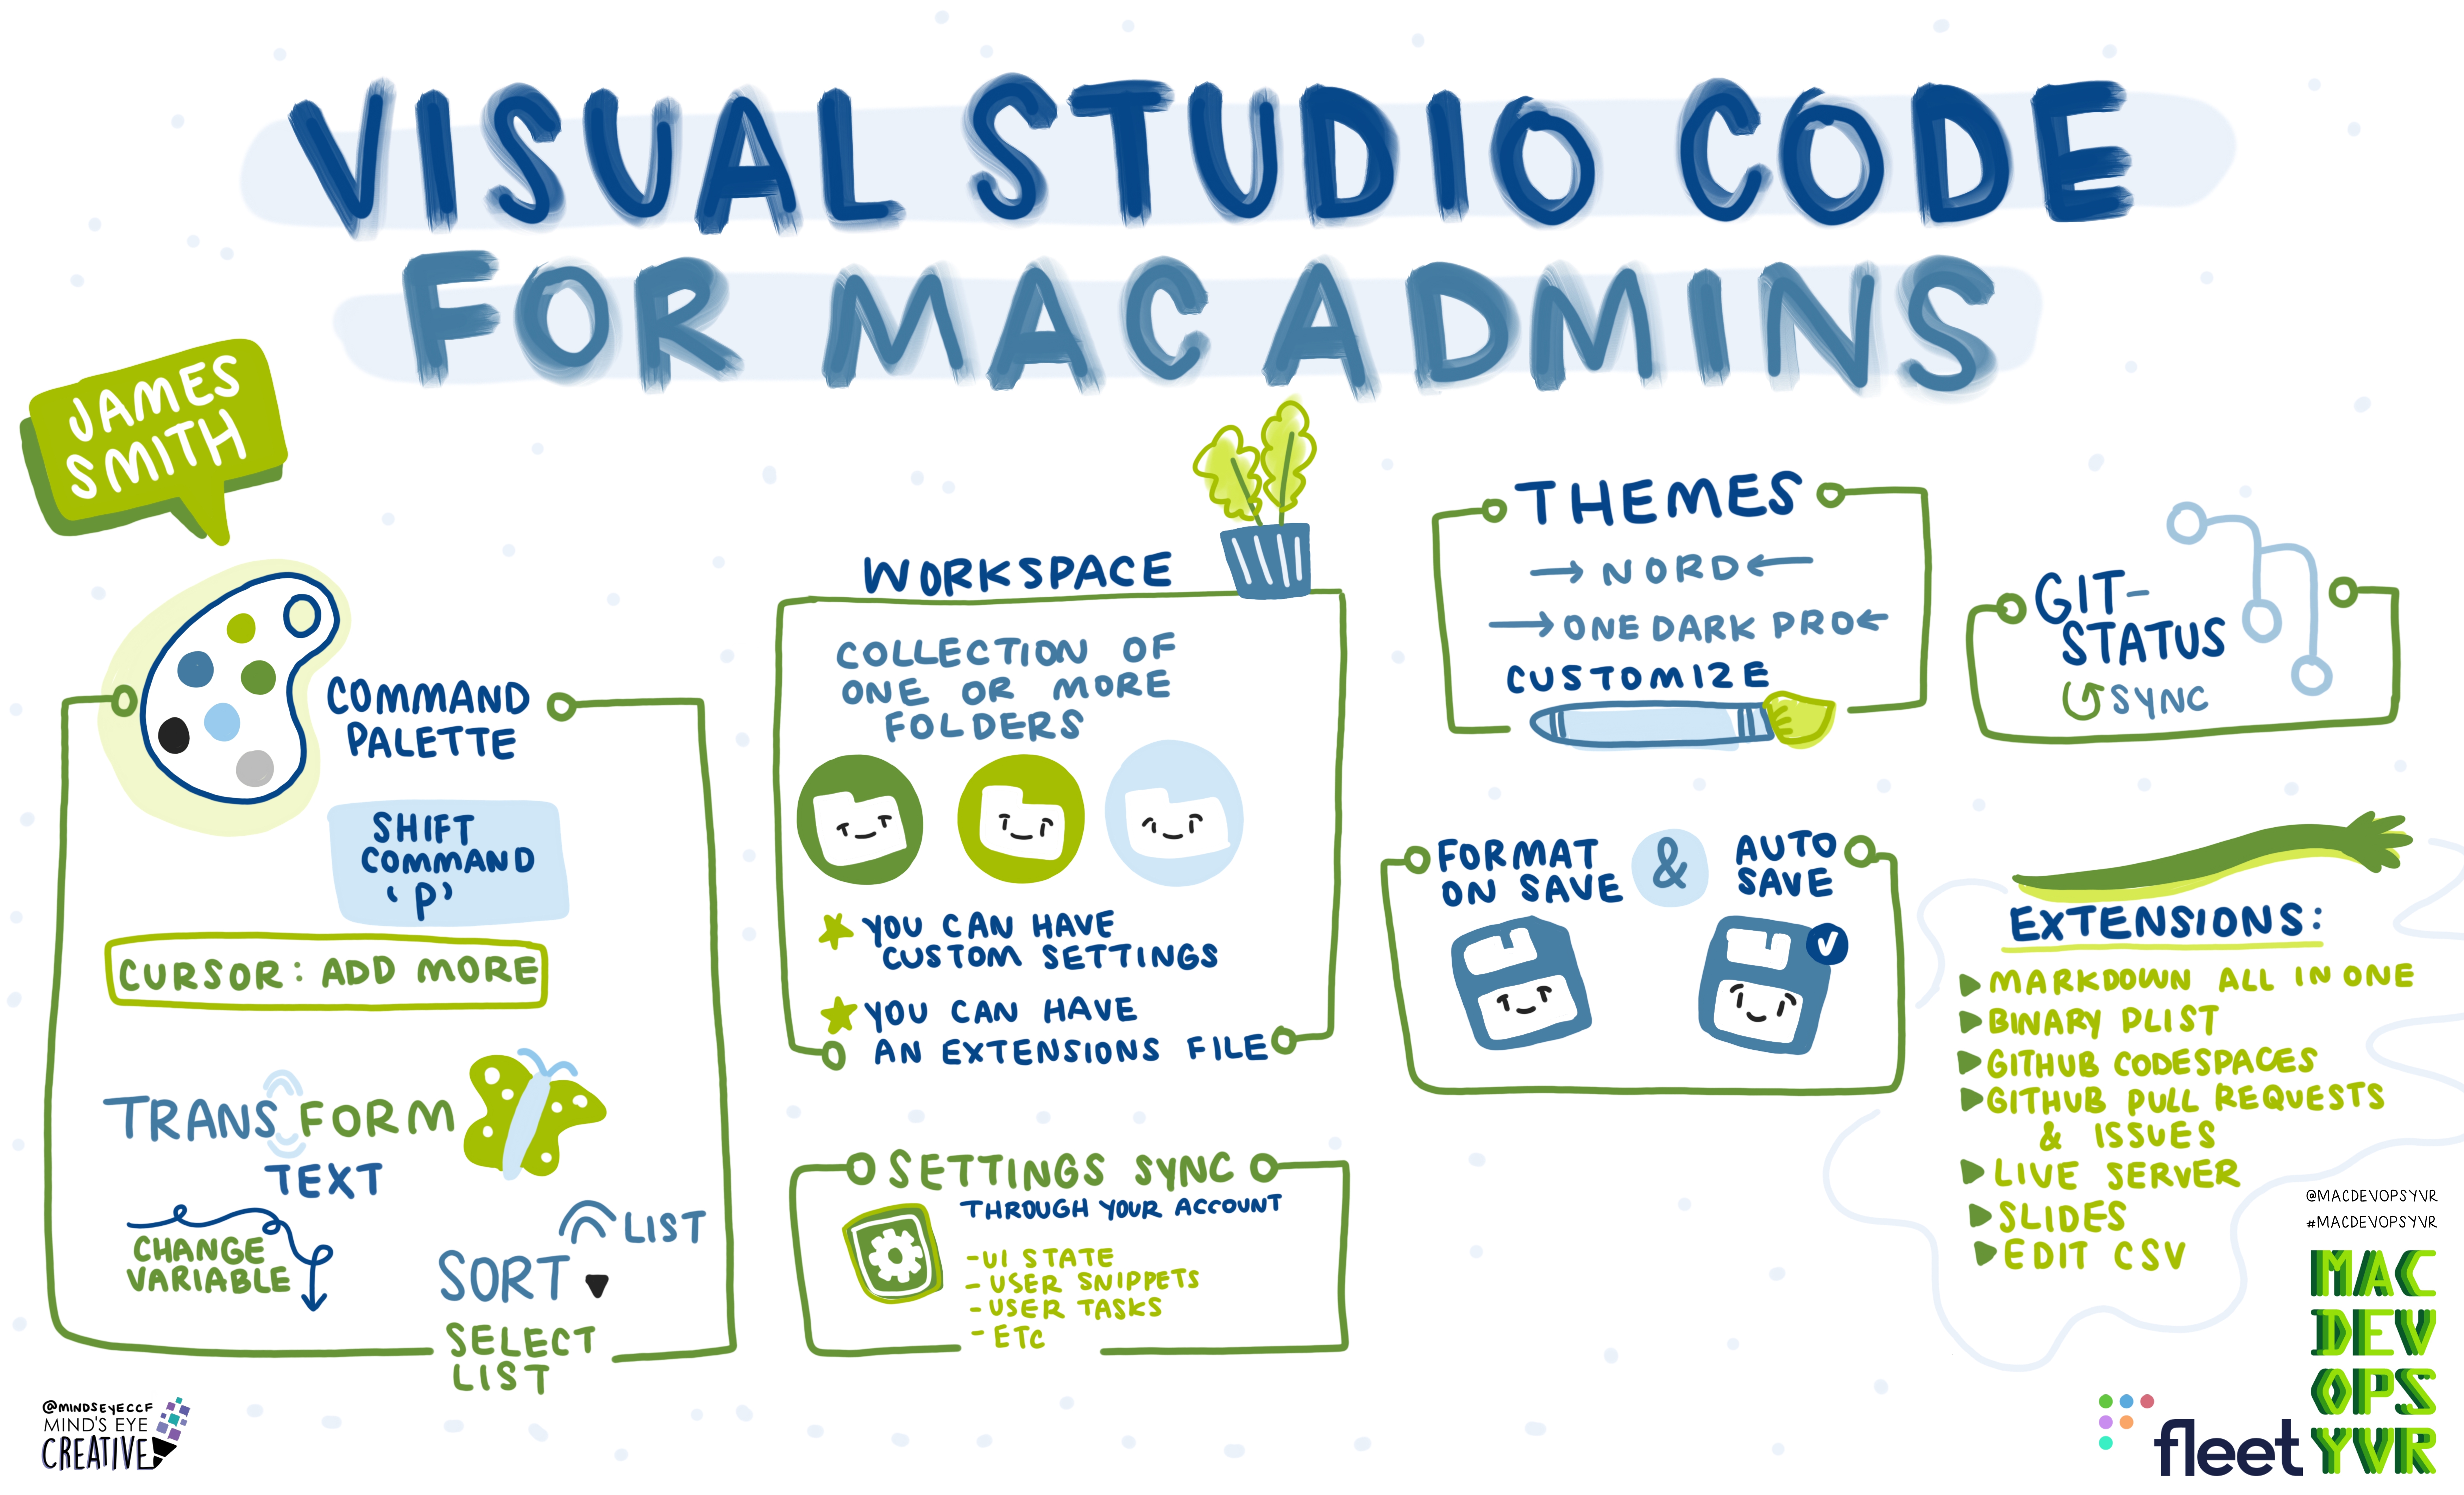
A massive thanks to Mat and the team at MacDevOps YVR for giving me the opportunity to present again at this year’s conference (despite the crazy time difference). The Sketchnote above was created by the talented Ashton Rodenhiser of Mind’s Eye Creative!}

I recently (just yesterday), updated how we’re installing Xcode on end-user systems at work and thought I might share the steps/script that we’re using.}
Did you know that you can launch a playing GIF from the Terminal? I didn’t until today; but it’s really quite simple.}
An in-depth look at how I deployed Zoom Rooms to iPads and Mac minis in a large office space while working at Culture Amp}
I ran into an interesting issue today, Macs that I know were in DEP would not show the Remote Management screen after connecting to Wi-Fi in the Setup Assistant.}
For the last few days I’ve been creating a set of enrolment policies for a loaner Mac, eg one that can be handed out in an instant to an employee if they forget their Mac at home (happens more than you think), or if theirs is damaged.}
As part of the onboarding at Culture Amp, I configure the dock at set a default wallpaper. This isn’t necessarily to lock down what Camper’s can do with their Macs but more-so to get them up and running as quickly as possible and in a consistent environment.}